Introduction
Codenames and Such is an unofficial book that details additional content for Codename Engine, a fangame engine for Friday Night Funkin' with a focus on softcoding, modding, and optimizations. The official wiki can be found here, for most cases.
The engine in question is the successor to a prior one, titled Yoshi Engine. However, that engine is considered outdated. Codename improves upon what Yoshi Engine did by allowing source code mods, using Haxe packages for organization, and being much more friendly in general.
This book details information not present in the current wiki, but is more intended for tips and tricks, as well as providing decisions based on circumstances. It's also meant to be more of a guide.
Warning: While the book is complete, contributions are welcome under the terms described here.
Setup
Installation
Codename provides stable and nightly releases.
Warning: Do note that Codename does not support mobile at the moment. There are plans to make a mobile port, but progress has restarted in recent times.
Dependencies
Although most dependencies are included with Codename builds, some users, especially Linux users, should take into caution the dependencies.
Codename, like Friday Night Funkin' itself, requires at least SDL to actually run. Alongside this, libvlc needs to be installed. Codename will refuse to run otherwise.
Stable release
Stable releases are generally considered to be well-tested, and should have most fixes. On occasion, release candidates are included for certain stable releases, which provide a look at what a stable release might offer, but may not be considered fully complete.
GitHub
GitHub provides stable releases, as well as release candidates.
Under the Releases section, you are able to see the latest version, as well as release candidates. Pick the appropriate platform you wish to use.
Note: There are additional assets available that are prefixed with
update. These have special properties and generally should not be used manually. The reason is that those are files that the automatic updater uses, which are not guaranteed to properly work using replacement. For this reason, if you want to manually update, download the regular build instead and replace the contents of your current Codename build with the new one.
Download the appropriate platform and extract it. Afterwards, run the program as you normally would.
Windows users: Never, ever, put Codename in your Desktop directory. This directory contains special properties that don't allow Codename to run properly. You should place it somewhere else, like your Documents directory.
Every user: Codename has trouble running under paths where there are special characters in them. You should preferably use standard English paths to avoid this.
GameBanana, itch
GameBanana and itch both have entries for Codename Engine. Simply download and extract the appropriate platform, similarly to the GitHub method mentioned above.
Nightly release
Although not the only way, above every other method for installing a nightly release, you should almost always consider the website. The reason for this is that it bypasses the GitHub account requirement when using typical GitHub Actions. As such, this section will explicitly follow the website method.
On the main page for the website, there are download buttons just a little below the large Codename logo. Simply press on the appropriate platform's button and you should download and extract, as usual.
Developer Mode
Codename provides Developer Mode, which is required to access certain useful features for development.
Turning on Developer Mode
Developer Mode can be turned on or off in the "Miscellaneous" section of the Options menu.
Developer Mode Features
Some features exclusive to Developer Mode are:
- The developer menu, which grants access to editors and such
- Access to development keybinds
- State reloads
- On Windows, the ability to open a console during runtime
- More!
Modpacks
Modpack Structure
Codename uses a specific directory structure for modpacks; that is,
specific directories are for specific purposes. However, all of them can be
considered optional, with the exception of data/config in modern Codename.
Generic Structure
A minimal mod should contain the following folders:
data: Contains information about data, whether it be characters, stages, and even states. This also containsdata/config/modpack.ini, which defines the configuration for your modpack using INI-style syntax. Upon entering a mod without this file in Developer Mode, Codename will typically display a warning and gives you the option to have Codename generate a sample configuration.images: Contains images for use in the game.songs: Contains global song scripts, as well as the actual songs themselves. A song takes up a subfolder in this directory, and possesses metadata in the form of a manifest, as well as the charts, audio assets, and scripts for the song.
More folders can also exist. Examples include:
fonts: Includes TrueType fonts for use in the game.shaders: Includes OpenFL shaders.sounds: Contains OGG Vorbis sounds.music: Contains OGG Vorbis music.videos: Includes video files. MP4 and WebM are guaranteed to work.
Later pages will specify a relative path, but not entirely including typical
syntax. All paths will also use forward slashes (/) to denote directories,
being the general standard on most operating systems, excluding Windows.
Below are a few example paths:
data/config/modpack.inisongs/fresh/meta.jsonimages/game/spinning-top.png
Creating a Modpack
Creating a modpack is as simple as creating a subfolder in the mods directory. The same applies for addons.
Upon startup
When you start up the mod for the first time, a warning will typically be dispatched, asking you whether or not you want the engine to create the modpack's configuration file:
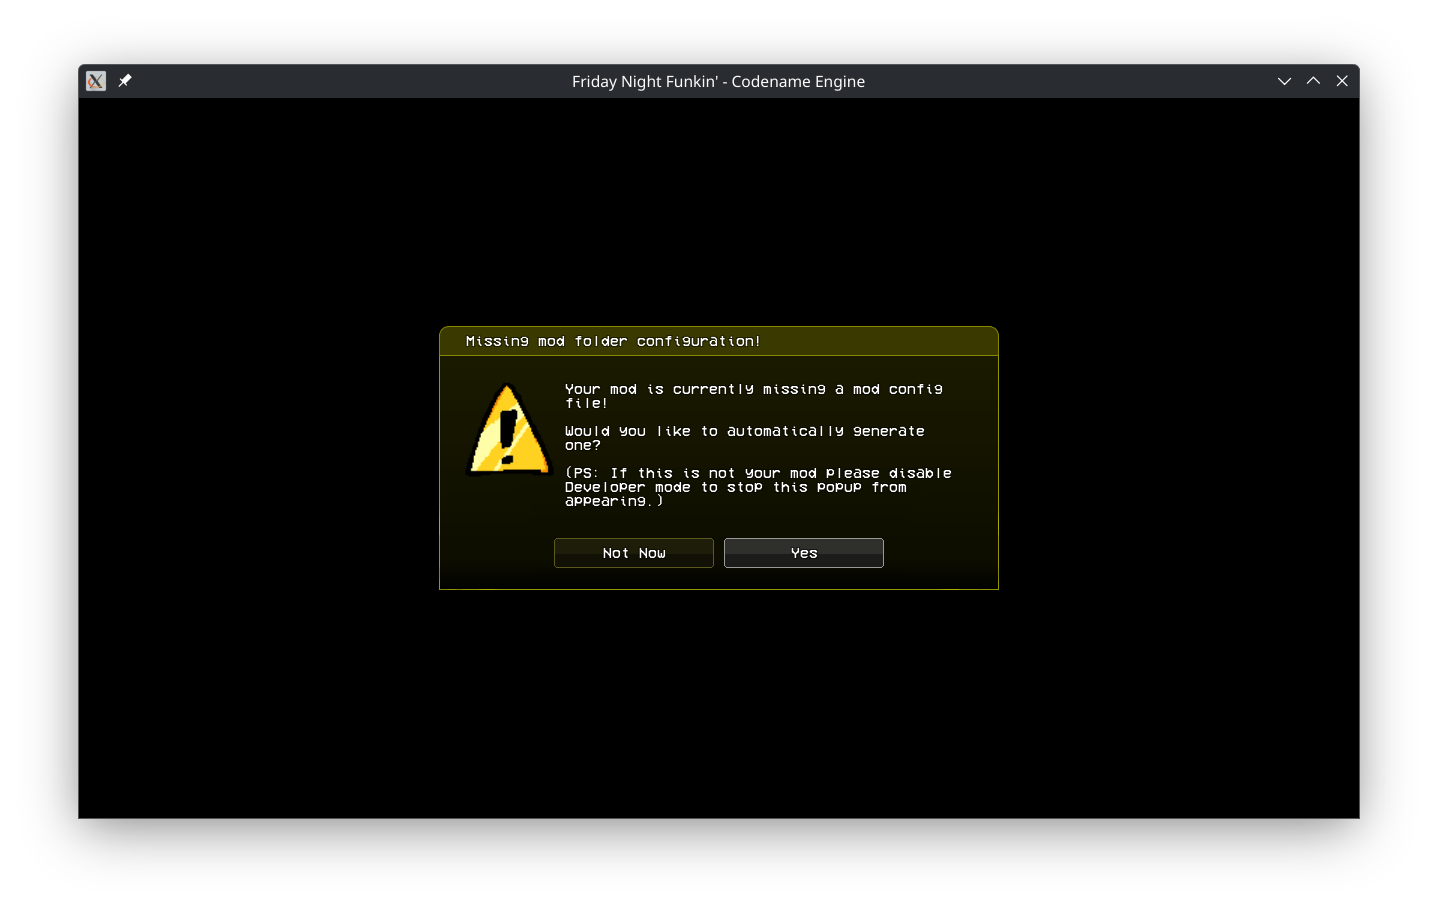
In most cases, you should allow the engine to generate the configuration file. This file is responsible for defining the metadata of your mod, as well as additional things, like Discord Rich Presence and state redirects. However, in certain cases, you may not want to have a configuration file at all, such as with testing.
There is also an option that should theoretically disable this popup right beside Developer Mode while keeping that state intact.
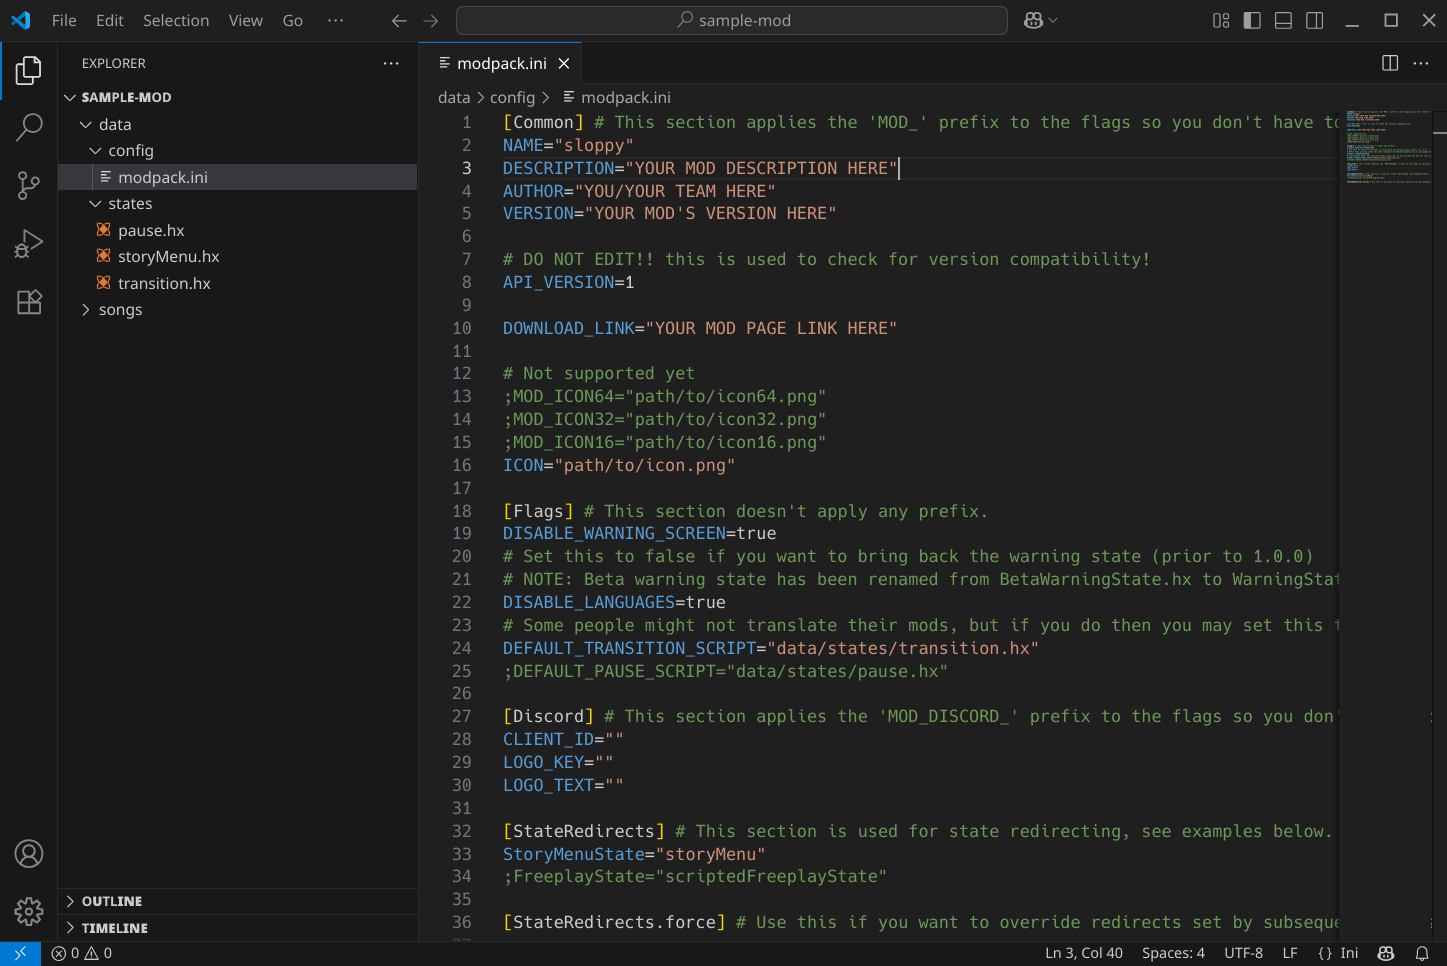
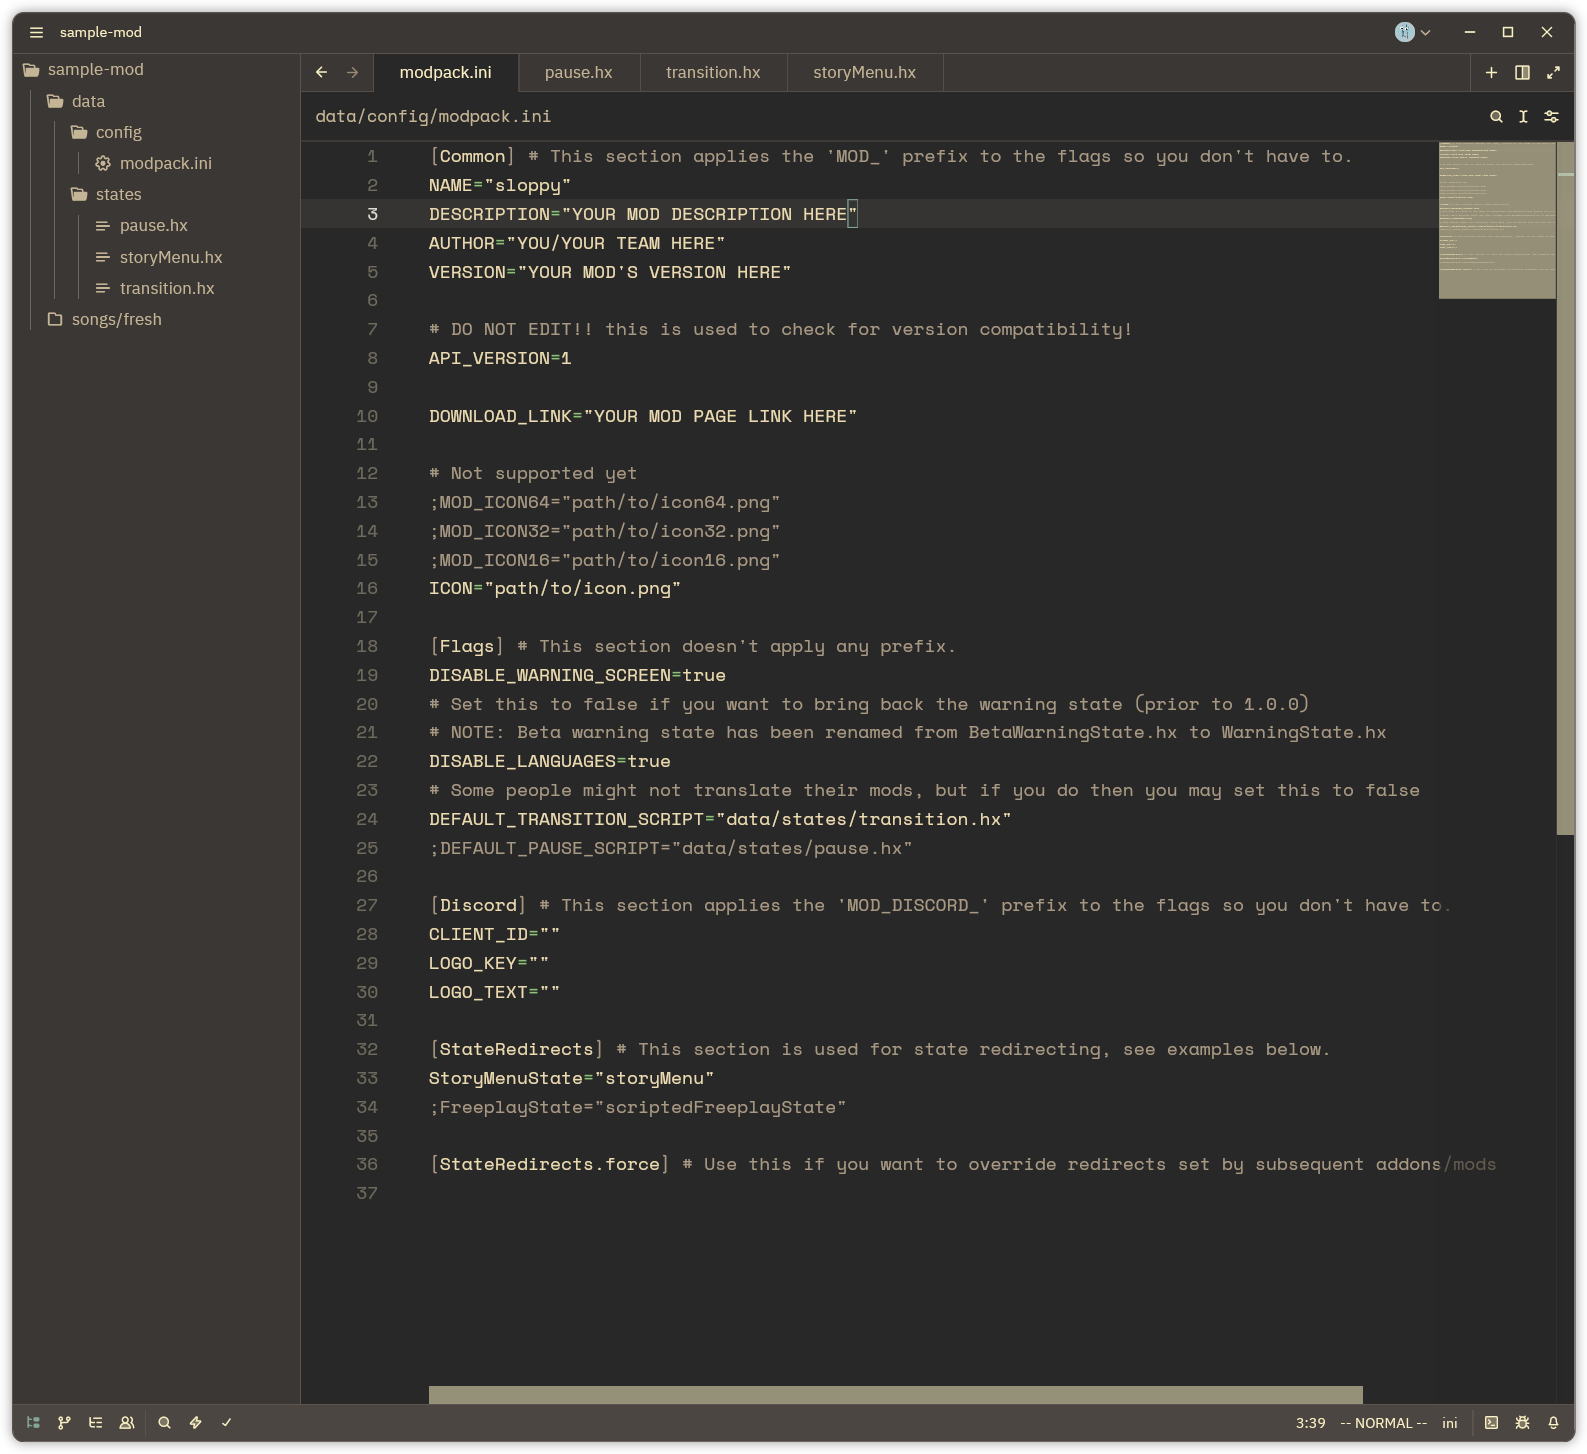
Modpack Configuration
If you followed the previous page, you should have a file under data/config
called modpack.ini.
This file is the modpack's configuration file. It defines metadata for the mod, but also details things like Discord Rich Presence, flags, and state redirects.
The modpack configuration file is in the INI/CFG syntax. If you have configured tools like GNU GRUB manually before, then the syntax should be the same.
The following section will list entries that are included by the generated configuration. You can tweak them to your liking.
Available tables
A full list of options can be found here.
Common
This section prepends the entries below with MOD_. These define the metadata
of your mod.
| Option | Default Value | Description |
|---|---|---|
| NAME | "YOUR MOD NAME HERE" | Mod name |
| DESCRIPTION | "YOUR MOD DESCRIPTION HERE" | Mod description, e.g. a tagline |
| AUTHOR | "YOU/YOUR TEAM HERE" | Mod author, e.g. "Mod Team" |
| VERSION | "YOUR MOD'S VERSION HERE" | Mod version, e.g. v0.1.0 |
| API_VERSION | 1 | Engine API version (don't edit!) |
| DOWNLOAD_LINK | "YOUR MOD PAGE LINK HERE" | Mod download link |
| ICON | "path/to/icon.png" | Mod's window icon in PNG format |
Flags
This section does not apply a prefix to the options. These are general options.
| Option | Default Value | Description |
|---|---|---|
| DISABLE_WARNING_SCREEN | true | Disables WarningState |
| DISABLE_LANGUAGES | true | Disables multi-language support |
Discord
This section uses the MOD_DISCORD_ prefix. The purpose of these options is
to configure Discord Rich
Presence.
| Option | Default Value | Description |
|---|---|---|
| CLIENT_ID | "" | Application ID |
| LOGO_KEY | "" | Large image key to use |
| LOGO_TEXT | "" | Large image key tooltip |
State Redirects
This section is special, in that it's dynamic. All of the options here are
state names, and the values are either a class path or a custom state under
data/states. The generated configuration should include examples.
Additionally, a force variant is available for overriding state redirects
from other addons and/or mods.
Cross-compatibility
In general, a good way to test your mod for cross-compatibility is to have playtesters on various platforms, to see how it performs and to look for oddities.
Another valid option is to develop entirely on a platform other than Windows. This is especially the case for Linux distributions, such as Ubuntu, Fedora, Arch, and even NixOS using a runtime, as a few examples.
Use the console to look for filename errors, and correct them as usual.
Wine and Derivatives
UNIX users in general have a tool called Wine that allows users to run Windows games on UNIX. This includes macOS, since that is based on UNIX to some capacity.
A fork of Wine exclusive to Linux users is Proton, which is also available to Steam Deck users as SteamOS is based off of Arch Linux. This provides special enhancements to make games work better.
Unfortunately, both of these tools aren't native, which is what this page is for.
When playtesting on anything UNIX-based, including the Steam Deck, preferably use a native build instead of Wine and/or Proton. This ensures that filenames and other features work correctly and errors can be found more easily. Development purely on either of these, especially on Linux, is also a valid option if you want to ensure cross-compatibility.
Addons
Addons are a special type of modpack that exist in the addons subfolder, instead of the mods subfolder, and are always loaded up. They are useful for defining quick scripts to get things done more productively, but are also good for new features, quality of life improvements, or even fully-fledged frameworks.
Modpacks can use a lot of data from an addon. So, this can lead to unique setups, particularly with global scripts.
Examples
Addon's global script:
static function addonHandleData(data:Array) {
    trace(data);
}
Mod's global script:
function new() {
    addonHandleData([1, 2, 3]);
}
Caveats
However, do note that, because variables and functions have the chance to not
exist or be from the required addon, it's a good idea to check the existence of
an addon using
ModsFolder.
Scripting
Callbacks
Callbacks, alternatively referred to as script calls, are functions that are directly emitted by the source code and into scripts. They act somewhat similar to entry points in most languages, including standard Haxe itself, but are used for scripts and can usually coexist with each other.
A callback may have an event attached to it, for modification purposes.
Most states have unique callbacks for specific purposes. One callback use may not work for another.
Callback Standard
This section details the book's callback standard.
Callbacks typically go in their own section and are in unordered lists. There will usually be a description, specifically about where the callback is usually emitted.
Some callbacks are grouped into their own subsections, due to a similar premise.
Three valid callback examples include:
[pre, post](c)reate: Called when the script is created.<pre, post>GameStart: Called during initialization of the game.onStageXMLParsed{StageXMLEvent}: Called once the stage definition has been parsed successfully.
The basic syntax of the name is as follows:
- Square brackets denote optional values, where either the part can be omitted entirely, or one value out of the list is chosen and replaces that part.
- The two standard comparison operators,
<and>, are similar to square brackets, but cannot be omitted. - Parentheses define that one or more lowercase characters included between them may be capitalized when there is a prefix.
- Angle brackets are used when an event is passed to the callback. Inside the angle brackets is the event type for reference.
Callback Events
Callback events, or simply just events, are containers of data for callbacks. They are typically the only parameter of any callback.
A callback event is different from a chart event in that
callback events are used exclusively for scripting, while chart events are
instantiated through charts and operate only on PlayState.
Common Events
Some events that are typically used, but are not limited to, include:
CancellableEvent: Perhaps the most used and inherited,CancellableEventis good for cancelling some sort of action. For example, it can cancel the gameplay countdown.NoteHitEvent: A type ofCancellableEventthat handles the state of note hits, as well as things thatPlayStateshould take into account, like the health gain.NoteMissEvent: Ditto, but for note misses.EventGameEvent: Used for handling chart events. This extendsCancellableEvent, but there is typically no need to cancel.
A full list of events and their API documentation can be seen here.
Custom Events
Custom events can be defined through DynamicEvent,
but there is typically no need to do this. The option is available, though.
Global Scripts
Global scripts are unique scripts located directly under the data subfolder.
They are typically used to manage the entire mod.
A typical standard for global script names is simply global.hx, but any other
name can be supplied as well.
Global scripts are nowadays somewhat generic, since they were originally used for handling state redirects by script, but have since had that functionality deprecated in favor of configuring state redirects in the modpack configuration. However, a lot can still be done with them.
Callbacks
new: Self-explanatory. This is nearly identical to the standardcreatecallback.focusLost: Alternative name foronFocusLost.focusGained: Alternative name foronFocus.
Time-based
<pre, post>Draw: Standard drawing callbacks.<pre, post>GameStart: Callbacks that are emitted while setting up the game.<pre, post>GameReset: Callbacks that are typically issued while resetting the game.<pre, post>StateSwitch: Usually emmited in response to state switching. The former variation was originally used for state redirects, but that form of state redirects had been deprecated.preStateCreate: Called before creating a state using that state'screatecallback.
Global Namespace
Interestingly, global scripts do not operate on something like a state.
Instead, they have their own namespace of sorts that each and every loaded
global script share through the GlobalScript class.
However, three separate methods exist to allow global scripts to interact with each other. The simplest one is to define shared variables and functions as static ones in order to provide the simplest syntax possible. As such, this is what this book provides.
Consider the example provided in Addons.
The addonHandleData function is defined as static. This allows the
possibility to use that function in other scripts as if it were part of that
script, which simplifies a lot of syntax.
Examples
Sharing an Array
Addon's global script:
static var data:Array<Int> = [0, 1, 2, 3, 4];
Mod's global script:
function new() {
    trace(data);
}
State Scripts
State scripts either extend a state, just like a stage or
gameplay script with their respective data, but can also be
custom states using two features:
ModStates
and state redirects. The following applies to substates as well.
Callbacks
<step, beat, measure>Hit{Int}: Called per the unit of song measurement used.onFocus: Called when the window has been focused.onFocusLost: Called when the window has lost focus.onStateSwitch{StateEvent}: Gets ran whenever the state is switched.onOpenSubState{StateEvent}: Gets ran whenever a substate is opened.onResize{ResizeEvent}: Gets called whenever the window is resized.destroy: Issued whenever the state's memory is cleaned up.
Time-based
[pre, post](c)reate: Called when creating the state/substate.[pre, post](u)pdate{Float}: Called once per frame.[post](d)raw{DrawEvent}: Called once per draw.
ModState
ModState is the core functionality for custom states, and is also used by
the state redirects feature. It defines a custom state to use.
You can switch to a pure ModState using:
FlxG.switchState(new ModState("state"));
This will issue a regular state switch. The ModState constructor takes the
state filename (under data/states and without the file extension).
Additionally, some Dynamic data can be passed to the ModState from the
current one, usually in the JSON format.
Substates should use ModSubState instead. It provides mostly the same
functionality, but instead operates on substates. The example above would
instead be this with ModSubState:
openSubState(new ModSubState("substate"));
State Redirects
State redirects can be configured using the modpack
configuration, under the StateRedirects
section.
Warning: State redirects will only work if no script exists under the same name as the state it's replacing. In that case, it's a simple state extension.
[StateRedirects]
MainMenuState="mainMenu"
This example sets the main menu to redirect to the custom state,
data/states/mainMenu.hx. All this does is intercept the state switching
mechanism to use a ModState if a state redirect is available.
Custom Transitions
It is possible to load a custom transition between states using either the
modpack configuration, or
MusicBeatTransition's
script property.
The following demonstrates a sample configuration that sets the
DEFAULT_TRANSITION_SCRIPT flag to point to a custom transition script:
[Flags]
# Note: Script paths in these kinds of flags need to be full; they aren't
# handled automatically.
DEFAULT_TRANSITION_SCRIPT="data/states/transition.hx"
Callbacks
destroy: Called upon the memory for the transition being cleaned up. Simply put, this is when the transition has finished and needs to be removed.onSkip{CancellableEvent}: Transitions can be skipped by holding the shift key. The event for this can be cancelled in order to avoid this behavior.
Time-based
[post](c)reate{TransitionCreationEvent}: Called upon the transition being created. The normal variant can be cancelled to prevent thepostvariant from running.[post](u)pdate{Float}: Called once every frame.on[Post]Finish{[CancellableEvent]}: Called when the transition has finished. This may be cancelled to stop the state from switching, and to stop thepostvariant from running.Note: The
postvariant does not take an event.
Special Cases
Pause Menu
The DEFAULT_PAUSE_SCRIPT flag should be able to set an extension for the
pause menu if you don't want to name the script the same name as
PauseSubState.
[Flags]
DEFAULT_PAUSE_SCRIPT="data/states/pause.hx"
Do note, however, that this is not equivalent to a state redirect, nor is that possible to do using the configuration. Instead, you may want to do the following in a gameplay script:
function onGamePause(event:CancellableEvent) {
    event.cancel();
    // The following is done in order to make sure that the game pauses
    // correctly.
    persistentUpdate = false;
    persistentDraw = true;
    paused = true;
    // Finally, open the substate!
    openSubState(new ModSubState("pause"));
}
Gameplay Scripts
Gameplay scripts are scripts that, true to their name, affect gameplay. In
particular, they affect
PlayState,
which is the gamestate responsible for main gameplay. The state is a standard
feature of most HaxeFlixel projects.
Gameplay scripts will generally either go directly under the songs subfolder
as a global song script, or into a respective song's scripts subfolder.
Gameplay scripts are able to modify PlayState in nearly every shape. They are,
however, a category of scripts in general. Things like stage scripts follow
similar callbacks.
For certain functionality, some knowledge of the PlayState API is required.
The following examples use some parts of the API on the documentation.
Callbacks
onStageXMLParsed{StageXMLEvent}: Called once the stage definition has been parsed successfully.onStageNodeParsed{StageNodeEvent}: Called once a stage node has been parsed successfully.onRatingUpdate{RatingUpdateEvent}: Gets called upon the rating being updated.on<Player, Dad, Note>Hit{NoteHitEvent}: Called upon a note being hit during gameplay.Playeris for the player,Dadis for the opponent, andNoteis generic.onCameraMove{CamMoveEvent}: Issued whenevercamGamemoves.onEvent{EventGameEvent}: Despite the interesting name, this callback is actually issued as a result of a chart event being triggered.onSubstate<Open, Close>{StateEvent}: Gets triggered manually byPlayState.onGamePause{CancellableEvent}: Issued whenever the game is paused upon entering the pause menu.
Time-based
on<Pre, Post>GenerateStrums{AmountEvent}: Emitted in time for strum generation.on[Post]NoteCreation{NoteCreationEvent}: Called on note creation.on[Post]StartCountdown{[CancellableEvent]}: Called when starting the countdown.Note: The
postvariant does not supply an event.on[Post]Countdown{CountdownEvent}: Ditto, but provides additional configuration.onSong<Start, End>: Each one gets called based on the position of the Conductor. However,onSongStartis issued before Discord Rich Presence and the music are actually initialized.on[Post]InputUpdate{[InputSystemEvent]}: Issued whenever the input gets updated.Note: The
postvariant does not supply an event.on[Post]PlayerMiss{NoteMissEvent}: Called when the player misses.on[Post]GameOver{GameOverEvent}: Issued upon the player receiving a Game Over.onVocalsResync: This is a special callback that is a result of an internal function ofPlayState. It generally does not need to be used, but is available if you wish to use the functionality.
Special Cases
onStartSong: This is similar toonSongStart, and is issued in the same function internally. The only difference is thatonStartSongis called after the music assets have begun playing and Discord Rich Presence has been updated.
Examples
Zoom Out Camera on Specific Camera Selection
function onCameraMove(event:CamMoveEvent) {
  switch (curCameraTarget) {
    case 0:
      defaultCamZoom = 0.7;
    case 1:
      defaultCamZoom = 0.9;
  }
}
curCameraTargetis an integer variable that describes which strumlinecamGamehas to hover over.defaultCamZoomdefines the zoom level to tween to by default forcamGame.
Use Losing Icon As Winning For Dad
function postCreate() {
  iconP2.healthSteps = [0 => 0, 80 => 1];
}
iconP1andiconP2are the health icons for the player and opponent, respectively.iconP2is used here.healthStepsis a property of a health icon in the form of aMap, where the key is the percentage of health and the value is the frame index or the animation name. It essentially sets at what percentage the health should be at for the character to use a certain icon. This property will typically be set to[0 => 1, 20 => 0], but it is useful for this kind of setup.
Local Scripts
Local scripts are what this book refers to as scripts that share the same namespace as proper Gameplay Scripts.
Below is a table, detailing the various types of local scripts:
| Parent | Location |
|---|---|
| Stage | data/stages/{stage}.hx |
| Character | data/characters/{char}.hx |
| Event | data/events/{event}.hx |
| Notetype | data/notes/{note}.hx |
Each one has an assigned parent that details their type. Each local script only gets run when their parent is active; for example, in the case of a stage script, then the stage would be active.
Do note that, in the case of a stage script, then the script has access to the stage elements as variables.
Callbacks
Shared with Gameplay Scripts.
Extras
Sparrow Atlases
Sparrow atlases are the standard form of spritesheets in anything Codename, and are used in other places, such as the original Friday Night Funkin' and Psych Engine.
They usually come from Adobe Flash or any derivatives, as well as spritesheet generators in most cases.
A sparrow atlas comprises of an image containing all of the frames, and then an XML file declaring the metadata and subtextures of the spritesheet, which are the frames present in the image.
Loading
Codename should be able to load sparrow atlases automatically.
Do note, however, that some special consideration needs to be taken into when using sparrow atlases. Codename will usually check for the definition file first, parse the filename without the file extension, and then search for an image file with that parsed filename prepended. This unfortunately does not work with the image attribute in these definitions, so both files need to be named the same.
Filenames
Some special considerations need to be taken into in regards to filenames and, by extension, subtextures.
Spritesheet generators will typically use the filename of each frame as a subtexture's name by default. This is unfortunately plagued by the fact that art programs will typically name exported images using project metadata and the time of the export.
Generally, when you're naming subtextures, which includes frames in spritesheet generators, they should follow a convention:
anim0000anim0001anim0002
...where anim is replaced by the name of the animation, and the digits at
the end being the frame number of that animation. Any number of digits can be
included, but a good amount is four digits, which is present in the examples
above.
Note: Some spritesheet generators may include the file extension in the subtexture names. You may either need to configure the program to exclude the file extension, or remove the file extension manually.
Tools
This page lists useful tools for Codename Engine modding: as in, this includes tools that are good for mod work.
Do note that this is purely from an external perspective. Only separate programs will be listed.
Pure Codename tools can be found on the website, and addons or scripts can be found in the Discord server.
Source Code Editors
Visual Studio Code
The open source AI code editor
Long for VSCode, Visual Studio Code is considered to be the editor with some of the most support for anything.
Features
- Ready Haxe support, through an extension
- Available "Codename Autocomplete" extension for language servers
- Easy interface to work with
- AI Support through GitHub Copilot, for those looking for that feature
- Cross-platform (Windows, macOS, Linux)
Caveats
- Telemetry is not configurable at the initial launch of the program, making it less private in the beginning
- Some features are not useful for Codename modding
- Not an "out of the way" user experience or interface
- Lacks many productive features
- Can be confused for the "mature" version, Visual Studio
- For some users, too much AI focus
Metadata
- Website: code.visualstudio.com
- Source Code: github:microsoft/vscode
Zed
The editor for what's next
Written in Rust, Zed is a source code editor focusing on performance and productivity.
Features
- Multiple keymaps, such as VSCode, JetBrains, Atom...
- Vim mode for emulating the Vi system, allowing much more productive typing and commands
- Strong, universal Git features, such as merge commits, stashing, and branching
- High-speed live collaboration
- Toggleable, expandable AI features
- Out-of-the-way user interface
- Expandable panes
- Useful Welcome screen that allows the quick configuration of settings
Caveats
- Settings are written in JSONC, making some knowledge of the superset required
- AI features are subscription-based
- People not familiar with Vim may have trouble if they use Vim mode
- Not as many extensions, including a lack of a Codename extension, although a Haxe one exists
Metadata
- Website: zed.dev
- Source Code: github:zed-industries/zed
Helix
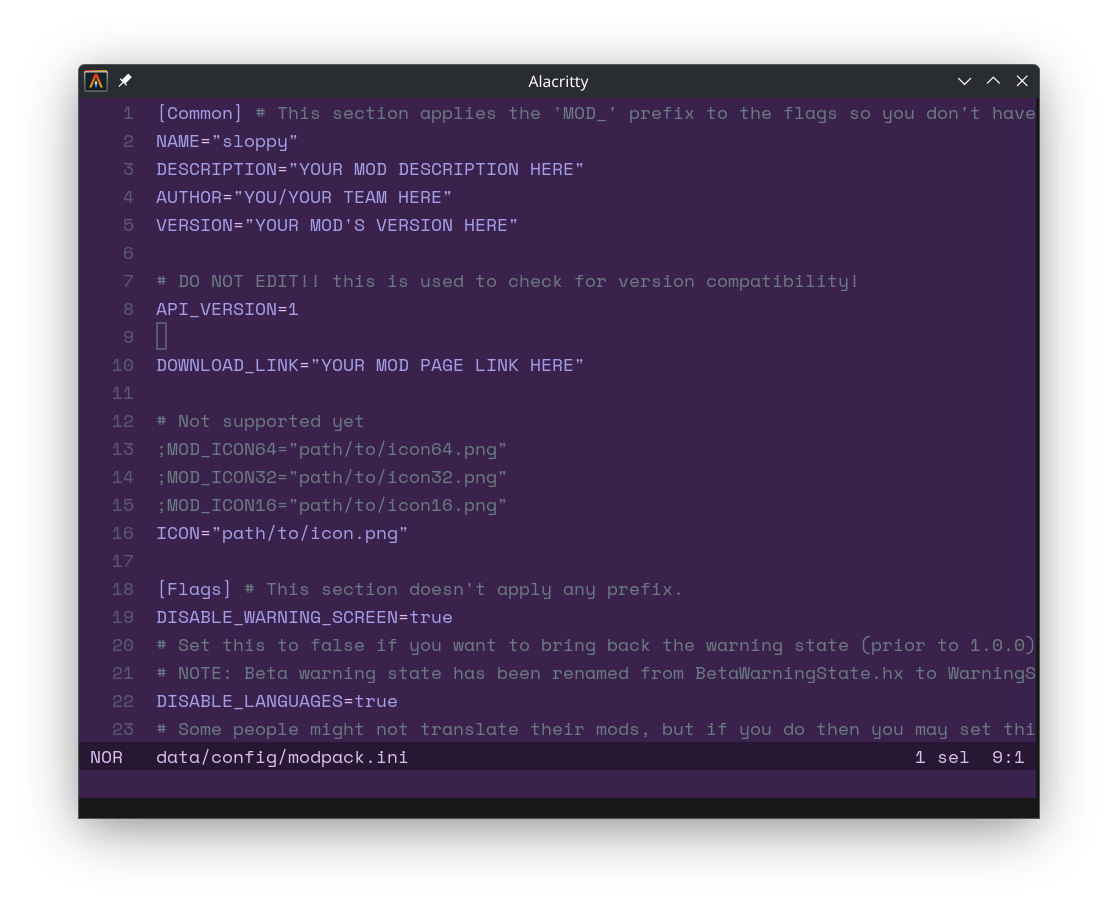
Note: The terminal emulator present in the screenshot is Alacritty.
A post-modern text editor
A descendant of the Vi system, Helix manages to provide modern features, while excelling and tweaking the Vi system for productivity.
Features
- Purely based on Vim, so anyone familiar with it will get a similar feel
- Plenty of shortcuts and aliases from the command palette
- Modal editor where each mode is initiated from a key press, so important keybinds can be assigned based on mode and with a lack of modifiers
- Tutorial available via the
:tutorcommand or runninghx --tutor - Good for configuration, simple editing, and more
- Configured using the TOML file format, allowing high readability while being based on INI
Caveats
- May be confusing for some users
- No official Haxe support, requiring some configuration, such as installation of the Haxe Tree-sitter grammar and Haxe language server
- Does not include an IDE configuration by default
- No Codename plugin available
Metadata
- Website: helix-editor.com
- Source Code: github:helix-editor/helix
Spritesheet Generators
Texture Packer EX
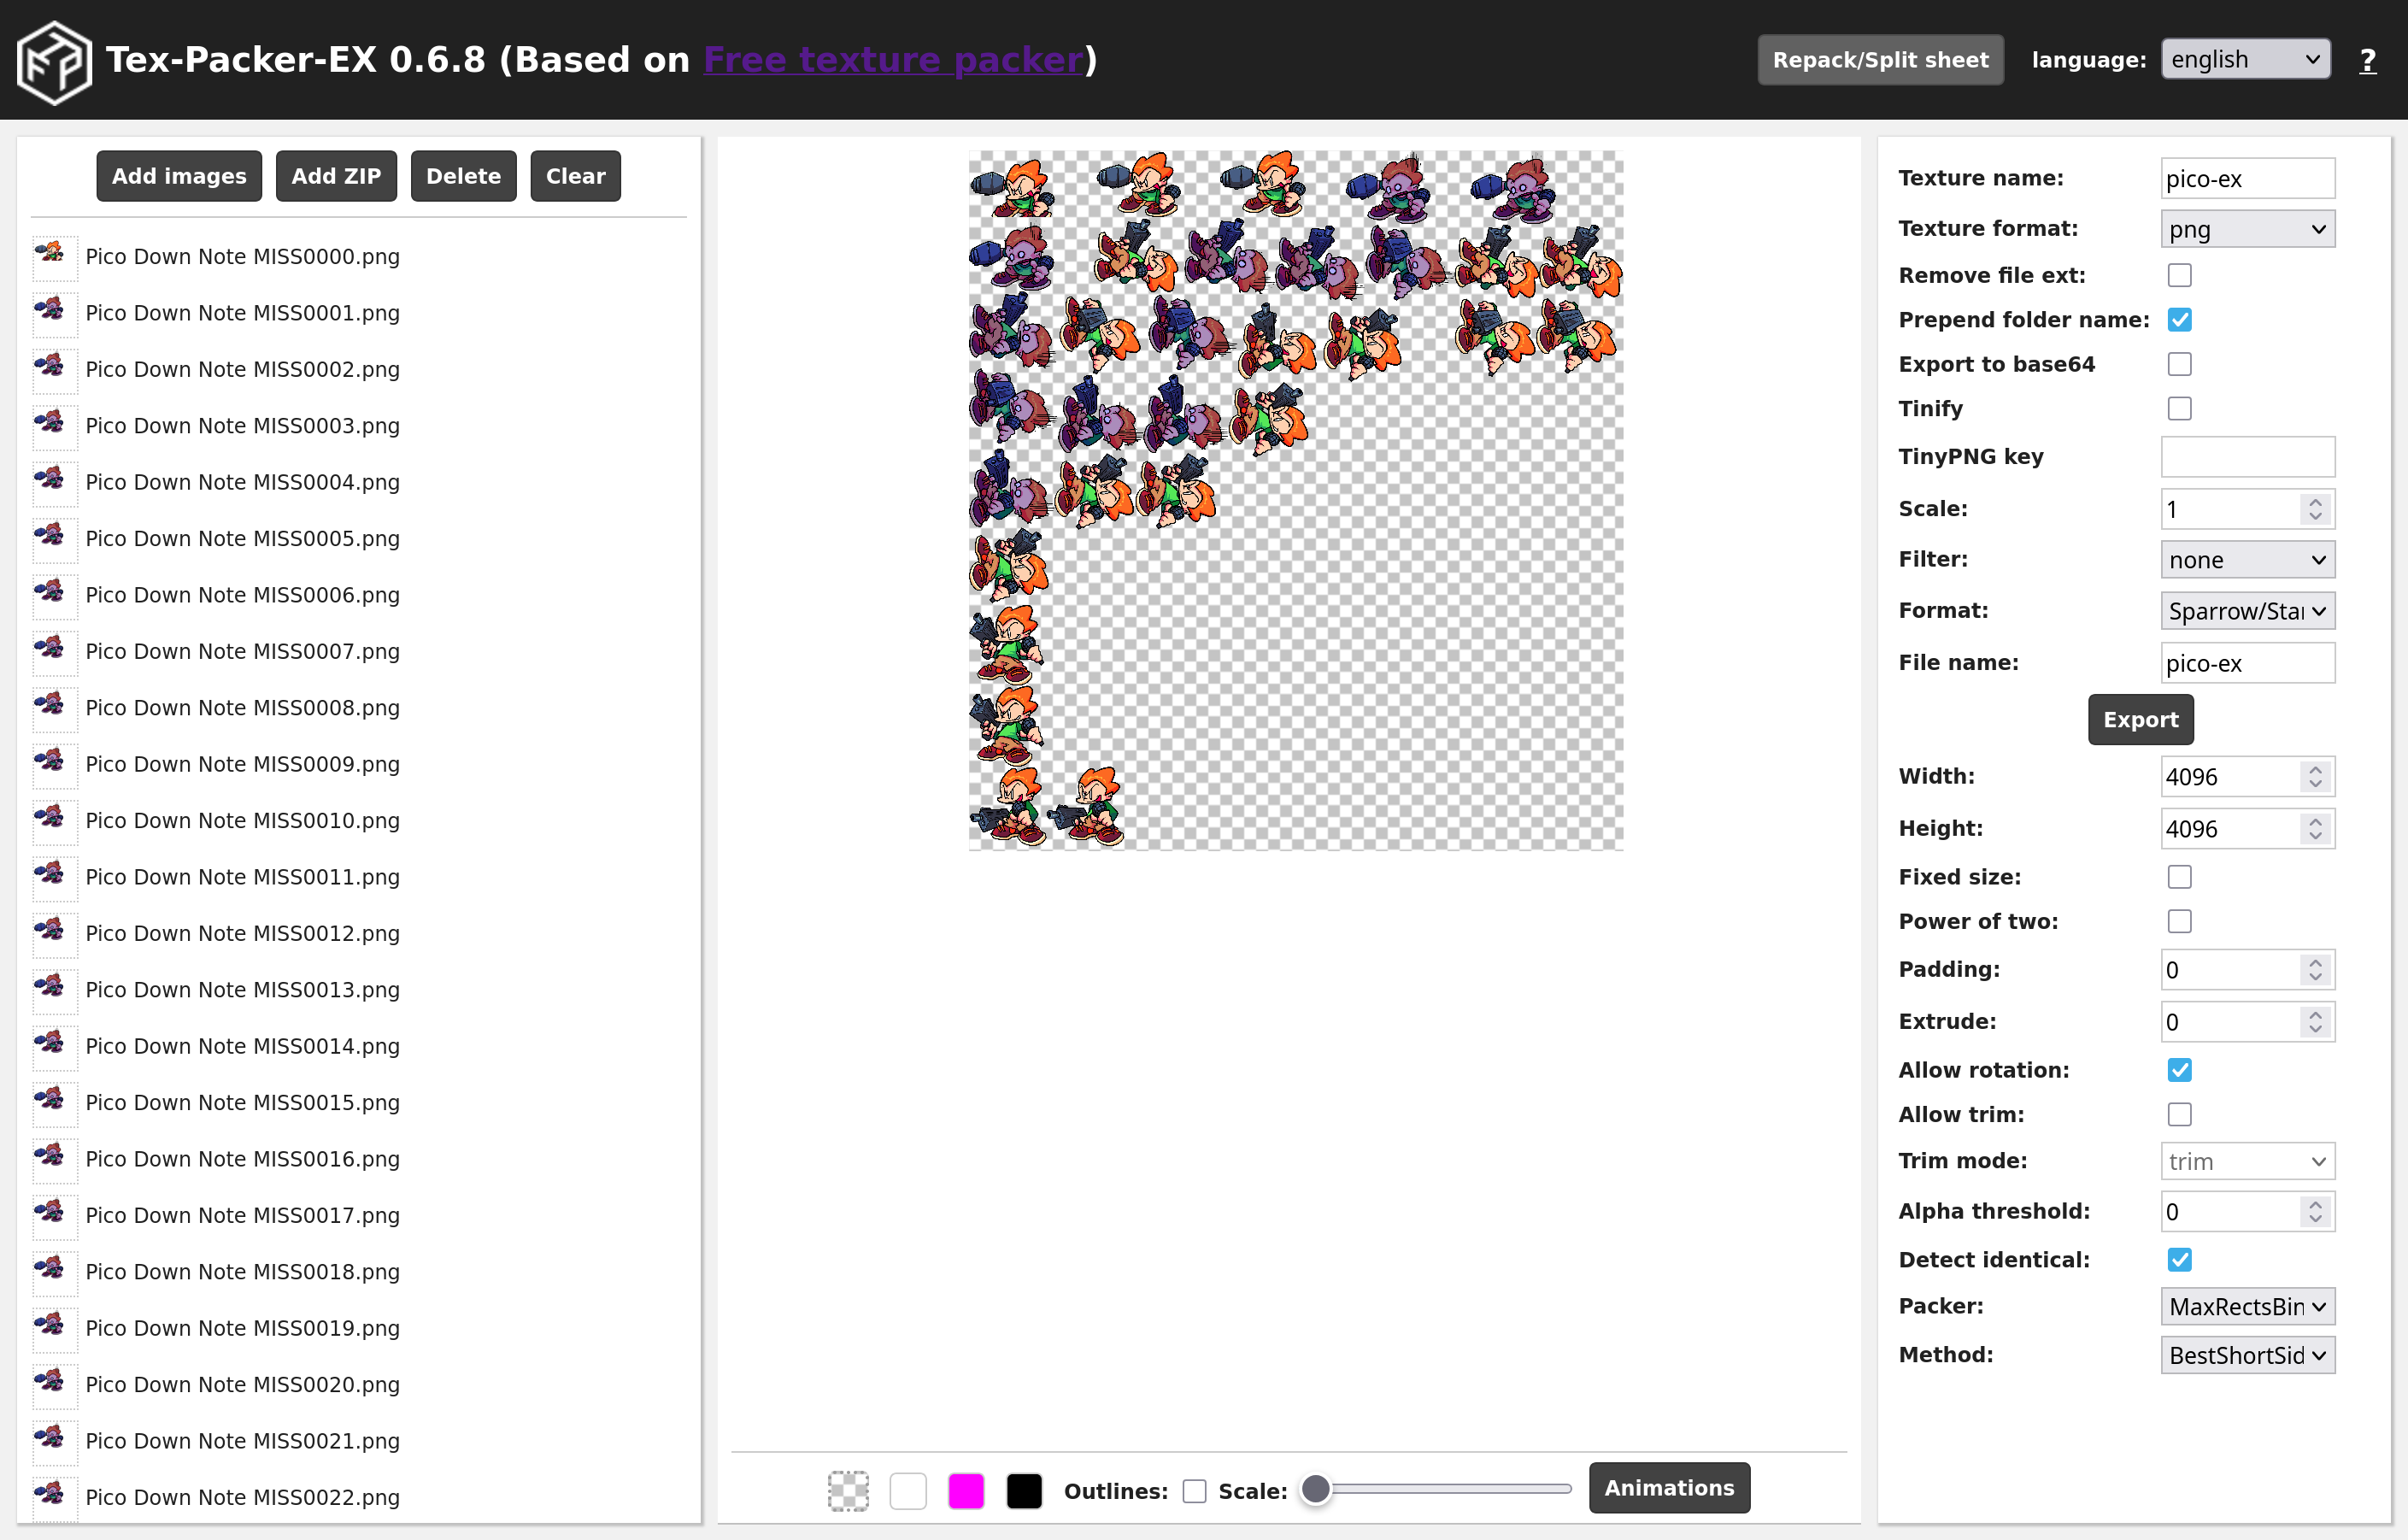
Fork of Free Texture Packer with added improvements
Tex-Packer-EX, short for Texture Packer EX, is a fork of Free Texture Packer that adds support for Sparrow atlases, better internal frame management, and repacking a spritesheet.
Features
- Allows splitting and repacking spritesheets to optimize and/or dissect them
- Allows viewing a spritesheet in real time
- Many customization options, including scaling, width, rotation, removing identical frames...
Caveats
- May be too overwhelming for some users
Metadata
- Website: kitzsh.github.io/tex-packer-ex
- Source Code: github:kitzsh/tex-packer-ex
UncertainProd's FNF Spritesheet and XML Generator (Web)
![]()
A web version of the Spritesheet and XML generator. Works entirely in-browser, written in JS and Rust/Webassembly
The FNF Spritesheet and XML Generator has been commonly used for smaller mods. The web version improves upon it by working in the browser.
Features
- A clear view of frames
- Allows selecting a prefix for frames
- Has a view for both the XML structure and the animations
Caveats
- The user experience may be too overwhelming for most users
- Hasn't been maintained in around a year
- Some features are not suitable for Codename at all